Jump to content

Hi to all our members ... We  would just like to draw your attention to the latest post on the following link... Thank you for your attention .If you have already responded to my note  on Chatbox  about this please ignore this sticky note ... Thanks  folks ....

http://www.tipf.co.uk/forums/topic/46369-important~-the-forum-its-future-and-finances/

Clicker and Ryewolf   ADMIN TEAM 

Regretfully we have to once again ask members for  some financial support in order to  keep TIPF  running till December 2023. The more pledges we have to become  FRIEND OF THE FORUM  the less the individual cost will be so  if you want this Forum to continue  please follow the link below  and decide  if you are able to  support us . Thank you all for your support in the past ... it has been appreciated  a great deal ...

https://www.tipf.co.uk/forums/topic/57184-202223-forum-finances-update-important-notice/

 Clicker and Ryewolf  ...  Admin Team 

Hi TIPFers 

I AM HERE AGAIN WITH THE  BEGGING BOWL TO ENSURE THE FORUM CAN KEEP GOING ... Please follow  below if you want to  support the continuation  of this Forum and  this  small but friendly community. 

As always your support is  both vital and appreciated ...

 Clicker and Ryewolf ...

https://www.tipf.co.uk/forums/topic/57184-202223-forum-finances-update-4th-july-2023/


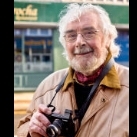
NINETY NINE PENCE PORTRAIT


FUJI

Recommended Posts

Love the isolation treatment Paul - not so sure about the highly textured skin?

I did consider a bit of smoothing but it's all his original skin texture I've just highlighted it with high pass and seeing as it was just for fun I left it
Link to comment

I did consider a bit of smoothing but it's all his original skin texture I've just highlighted it with high pass and seeing as it was just for fun I left it

Hi Paul,

That is a fantastic bit of twiddling.........except for the overworked skin textures ( it had the High Pass treatment first time around)...... I like the darker treatment that you give to many of your other creations.

How do I go about that please?

Not that I would do it as a matter of course, but so that the thechnique is in my creative armoury.

Cheers!

FUJI

Link to comment

I opened in Adobe camera raw under filters and selected the paint brush icon at the top of the page, this is the adjustment brush. Next I reduce exposure, highlights and shadows to -100 and contrast to +100 and paint up to the edge of the subject. Next I select the circle icon (adds vignette) and tweak the size of the circle to taste. Next I open in ps and duplicate layer, then I select high pass at 2 pix and choose overlay in the layers palette. Next I duplicate layer again and press ctrl and F which duplicates your last action I then adjust opacity to suit and flatten. Next I duplicate layer again and select desaturate under adjustments and then adjust opacity to suit. Next I duplicate layer again and do any dodging or burning needed then flatten. Next duplicate layer again and use this as your sharpen/blurring layer, adjust opacity to taste and flatten and then your done

Link to comment

Hi, Paul,


Thanks for that......


I admit to not exactly following your instructions.........I use CS6 so perhaps I don't have exactly the same Icons?


But I do have TOPAZ Filters, so I used it to achieve this result....the end sharpening was done using your High Pass formulae, but wont be as harsh because I worked on the original RAW file.


I didn't wand to exactly copy your technique anyway, but needed the motivation to achieve my own version using techniques I have learned and experiment with.


I always have problems brushing exactly round an object, it is very difficult not to go over a tiny bit here and there.....I haven't discovered a foolproof masking method yet.


Up for observations and comments folks....Fire away:


Best viewed LARGE.........Click on Pic:


FUJI

post-4-0-25860600-1408179899.jpg

Link to comment

Hi, Paul,


Thanks for that......


I admit to not exactly following your instructions.........I use CS6 so perhaps I don't have exactly the same Icons?


But I do have TOPAZ Filters, so I used it to achieve this result....the end sharpening was done using your High Pass formulae, but wont be as harsh because I worked on the original RAW file.


I didn't wand to exactly copy your technique anyway, but needed the motivation to achieve my own version using techniques I have learned and experiment with.


I always have problems brushing exactly round an object, it is very difficult not to go over a tiny bit here and there.....I haven't discovered a foolproof masking method yet.


Up for observations and comments folks....Fire away:


Best viewed LARGE.........Click on Pic:


FUJI


That's brilliant! Paul's expert tutorial brought to superb fruition. I love that. 


One question : both you and Paul flatten several times as you go, whereas I tend to do it right at the end when I'm happy - if I'm not, I can simply adjust the particular layer until I am. Why flatten as you go, as disk space is only relevant when you come to save at the end?

Link to comment

Did you use any flash at all, fuji?

To answer Chris's question first.........I was taught that way, I find it much easier than attempting to juggle layers.....it might be something to do with my numbers problem.........cant be doing with long lists if things or any kind of order......I suffer from a completely chaotic, creative, sideways looking and lateral thinking mind set........I think? ;-)

No, flash used Jamwheel, he was extremely close to a tall well lit chilled cabinet in the 99 Pence Store, I did request that he move coser to it to get best ambient light.

I very rarely use flash ( except for macro) ......Why?......... Because I once received great one to one tutoring from a pro Wedding Photographer, who also rarely used one...........he taught me all he could about low light photography.

FUJI

Link to comment

To answer Chris's question first.........I was taught that way, I find it much easier than attempting to juggle layers.....it might be something to do with my numbers problem.........cant be doing with long lists if things or any kind of order......ai suffer from a completely chaotic, creative, sideways looking and lateral thinking mind set........I think? ;-)


Sure, I can get that. But my understanding of why layers were created in Photoshop (they didn't exist before version 3) is that you can always go back to the offending layer if you've done a lot of work after it, and transform / adjust / delete it according to taste. Once you flatten, you can't go back and readjust if you subsequently decide a particular edit isn't quite right.


If you name your layers according to what you've used them for, it's much easier to keep track of them,  as numbers aren't involved anymore. ;) 

Link to comment

That's brilliant! Paul's expert tutorial brought to superb fruition. I love that. 


One question : both you and Paul flatten several times as you go, whereas I tend to do it right at the end when I'm happy - if I'm not, I can simply adjust the particular layer until I am. Why flatten as you go, as disk space is only relevant when you come to save at the end?

the main reason I flatten as I go is because normally I want to change an image as a whole for eg going from the high pass to the desaturated layer I find it better to desat the high passed image rather than having a separate layer, I find this gives me a better view of progression, it's not to say I do this all of the time, if I'm working a normal portrait I may have several layers running at the same time, skin, hair, eyes etc but for this "grunge" technique I like to flatten as I go. As for the edit, it's superb. Well done Fuji. Ps if your struggling to get up close and personal so to speak just zoom in to 400% and pixel peep to get the edge
Link to comment

the main reason I flatten as I go is because normally I want to change an image as a whole for eg going from the high pass to the desaturated layer I find it better to desat the high passed image rather than having a separate layer, I find this gives me a better view of progression, it's not to say I do this all of the time, if I'm working a normal portrait I may have several layers running at the same time, skin, hair, eyes etc but for this "grunge" technique I like to flatten as I go. As for the edit, it's superb. Well done Fuji. Ps if your struggling to get up close and personal so to speak just zoom in to 400% and pixel peep to get the edge


Yes, I can understand that too - but I find that if I create a 'layer group' in Photoshop, I can apply some adjustments to the whole group. There's also the 'Group with previous layer' check box, but that always confuses me : what do Adobe mean by "previous" - the layer you were last working on? the layer below? If they weren't at war with Apple, they could learn some useful lessons about clarity and ease of use.

Link to comment

Archived

This topic is now archived and is closed to further replies.

×
×
  • Create New...