Jump to content

Hi to all our members ... We  would just like to draw your attention to the latest post on the following link... Thank you for your attention .If you have already responded to my note  on Chatbox  about this please ignore this sticky note ... Thanks  folks ....

http://www.tipf.co.uk/forums/topic/46369-important~-the-forum-its-future-and-finances/

Clicker and Ryewolf   ADMIN TEAM 

Regretfully we have to once again ask members for  some financial support in order to  keep TIPF  running till December 2023. The more pledges we have to become  FRIEND OF THE FORUM  the less the individual cost will be so  if you want this Forum to continue  please follow the link below  and decide  if you are able to  support us . Thank you all for your support in the past ... it has been appreciated  a great deal ...

https://www.tipf.co.uk/forums/topic/57184-202223-forum-finances-update-important-notice/

 Clicker and Ryewolf  ...  Admin Team 

Hi TIPFers 

I AM HERE AGAIN WITH THE  BEGGING BOWL TO ENSURE THE FORUM CAN KEEP GOING ... Please follow  below if you want to  support the continuation  of this Forum and  this  small but friendly community. 

As always your support is  both vital and appreciated ...

 Clicker and Ryewolf ...

https://www.tipf.co.uk/forums/topic/57184-202223-forum-finances-update-4th-july-2023/


THE FIDDLER


FUJI

Recommended Posts

How do you know it wasn't taken in mono?

I never shoot in mono Chris........always in RAW colour, so post processing is essential to get best results.......I was forced to use a touch of Gaussian blur on the background after cloning out a large, very bright reflection on a window.....the colour version gas a busy background.......I wanted to emphasise my main character.

FUJI

Link to comment

I never shoot in mono Chris........always in RAW colour, so post processing is essential to get best results.......I was forced to use a touch of Gaussian blur on the background after cloning out a large, very bright reflection on a window.....the colour version gas a busy background.......I wanted to emphasise my main character.

FUJI


Any particular reason? One of the Custom settings on my Lumix is set up for B&W, with increased contrast, sharpness, and less noise reduction, for best results. Though that doesn't rule out some PP work of course. Then it's just a matter of seeing shots that are natural for B&W. (I used to do a fair amount of B&W shooting on Ilford FP4 back in the day - and I even processed the occasional colour negative onto B&W paper which gave interesting results).


Your amazing picture here looks as though it was a natural for B&W right from the start.

Link to comment

Hi, Chris, I appreciate your comments and observations.........I do have a mono setting on all of my cameras, but don't use it, because I like to handle the whole if the conversion and post processing myself........I use a technique called.......Contrast Grading.....using soft brushes on flattened layers to build up tones and contrast, selectively bit by bit finishing off with targeted sharpening.

In the old film days you had to shoot in mono or colour....but not both at the same time ;-)

FUJI

Link to comment

I use a technique called.......Contrast Grading.....using soft brushes on flattened layers to build up tones and contrast, selectively bit by bit finishing off with targeted sharpening.

In the old film days you had to shoot in mono or colour....but not both at the same time ;-)


What's a flattened layer? (Sounds like an oxymoron to me, but I wouldn't claim my understanding of Photoshop is more than around 25%). Could you explain that technique in more depth, or even give us a tut on it? 


It's true you had to choose between mono or colour film, but the really really serious guys had interchangeable camera backs, one loaded with B&W film, the other with colour transparency film.

Link to comment

What's a flattened layer? (Sounds like an oxymoron to me, but I wouldn't claim my understanding of Photoshop is more than around 25%). Could you explain that technique in more depth, or even give us a tut on it? 


It's true you had to choose between mono or colour film, but the really really serious guys had interchangeable camera backs, one loaded with B&W film, the other with colour transparency film.

Hi, again Chris,

There is a tutorial on my technique and workflow.......Phil or Richard, May know how to re- find the link to it, I remember that it included screen shots.

Basically, After I have opened, straightened and cropped a pic in PS, I use the work panel on the RH side of the screen to pull down a copy, I then select.......CURVES.....to choose an area to brighten or darken using a soft air brush with opacity set to my desired level.......I then click ALT at the same time as clicking on the copy icon to reverse the mask colour.......after this I can see the affect my brush is having........when I am happy, I flatten the layer, thereby saving disc space.....many don't do this, in case they wish to return.....but I ensure that all is well prior to flattening.....using layers like this you can apply any type of brush stroke, blur or sharpening.....but I stick to playing with tones......a touch on the saturation pedal may be required ....that is done on a layer too....

My technique for both colour and mono pics follows the same formulae.......it definitely adds depth and texture to my work.......final sharpening of the RAW file is targeted to relevant areas adding depth ..... Done in steps, again on layers that are flattened as I progress.....the FIDDLER and my OWL pic demonstrate the result very clearly....the important thing is to be very subtle when adding or subtracting from areas of tone.

Hoe this makes sense?

FUJI

..

Link to comment

Good shot Fuji so characterful, I always shoot raw except for last week when i had been mucking about and left it on jpeg and shot all weekend on jpeg setting! I use lightroom and the Nik software siver efex pro for the conversion. 

Link to comment

Basically, After I have opened, straightened and cropped a pic in PS, I use the work panel on the RH side of the screen to pull down a copy, I then select.......CURVES.....to choose an area to brighten or darken using a soft air brush with opacity set to my desired level.......I then click ALT at the same time as clicking on the copy icon to reverse the mask colour.......after this I can see the affect my brush is having........when I am happy, I flatten the layer, thereby saving disc space.....many don't do this, in case they wish to return.....but I ensure that all is well prior to flattening.....using layers like this you can apply any type of brush stroke, blur or sharpening.....but I stick to playing with tones......a touch on the saturation pedal may be required ....that is done on a layer too....


It does make some sense - except I use Curves on a whole layer or selection by adding one or more points to a transverse graph, bending the line out of straight. How do you use it with a brush?


Also, how do you flatten a single layer? My understanding is that flattening is done to all layers at the end of the process, so that instead of a multi-layered document (which as you say, takes up zillions of bytes!) you end up with one which you can then save in the format of your choice.


If anyone finds your tut, I'd be well chuffed! (I presume it's not in the tut forum?)

Link to comment

Hi, Chris,

Attempting to précis my instructions, a little was lost along the way.........After making a layer, I go to ....CURVES....use the ....Eye Dropper.......to choose the area to be worked on.........this brings up the diagonal Curve diagram.......I alter the curve to suit my intentions........ensure the layer us right........THEN use a soft Air Brush set at my chosen opacity and flow to gently alter tone in the chosen area..........I double check to make sure all is well then choose........LAYERS flatten to lessen storage space......I repeat this after each adjustment.

I have a numbers and sequencing problem, so it is my choice to keep things simple.

PHIL or RICHARD........do you know his to put a link to my tutorial into the a Tutorial section please?.......it is tucked away somewhere.

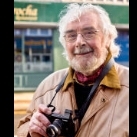
On the Mono Forum it was suggested that I bring down the tones on the face, and darken the corners slightly.....here is the revised study.

Cheers!

FUJI

post-4-0-54739700-1381305352.jpg

Link to comment

Interesting - you flatten each time you're happy with a layer adjustment? I don't flatten until right at the end (and if I have doubts, I save the mega-tanker .psd file, and only delete it a year or two later when I've lost interest in the image) - I feel it gives me more flexibility to go back to a particular adjustment and either tweak it or start over. 

Link to comment

Archived

This topic is now archived and is closed to further replies.

×
×
  • Create New...